Capabilities
- Sync user identities from OneLogin to ConductorOne
-
Resources supported:
- Roles
- Application assignments
-
Provisioning supported:
- Role assignment
Add a new OneLogin connector
1
In ConductorOne, navigate to Admin > Connectors and click Add connector.
2
Search for OneLogin and click Add.
3
Choose how to set up the new OneLogin connector:
- Add the connector to a currently unmanaged app (select from the list of apps that were discovered in your identity, SSO, or federation provider that aren’t yet managed with ConductorOne)
- Add the connector to a managed app (select from the list of existing managed apps)
- Create a new managed app
4
Set the owner for this connector. You can manage the connector yourself, or choose someone else from the list of ConductorOne users. Setting multiple owners is allowed.
5
Click Next.
Next steps
- If you are the connector owner, proceed to Configure your OneLogin connector for instructions on integrating OneLogin with ConductorOne.
- If someone else is the connector owner, ConductorOne will notify them by email that their help is needed to complete the setup process.
Configure your OneLogin connector
Step 1: Locate your OneLogin domain
1
Look up your OneLogin domain, which is found in the URL of your OneLogin instance:
<YOUR DOMAIN>.onelogin.com.2
Make a note of your domain. We’ll use it in Step 3.
Step 2: Create an API credential
1
Sign into OneLogin as an Account owner or Administrator.
2
Navigate to Developers > API Credentials.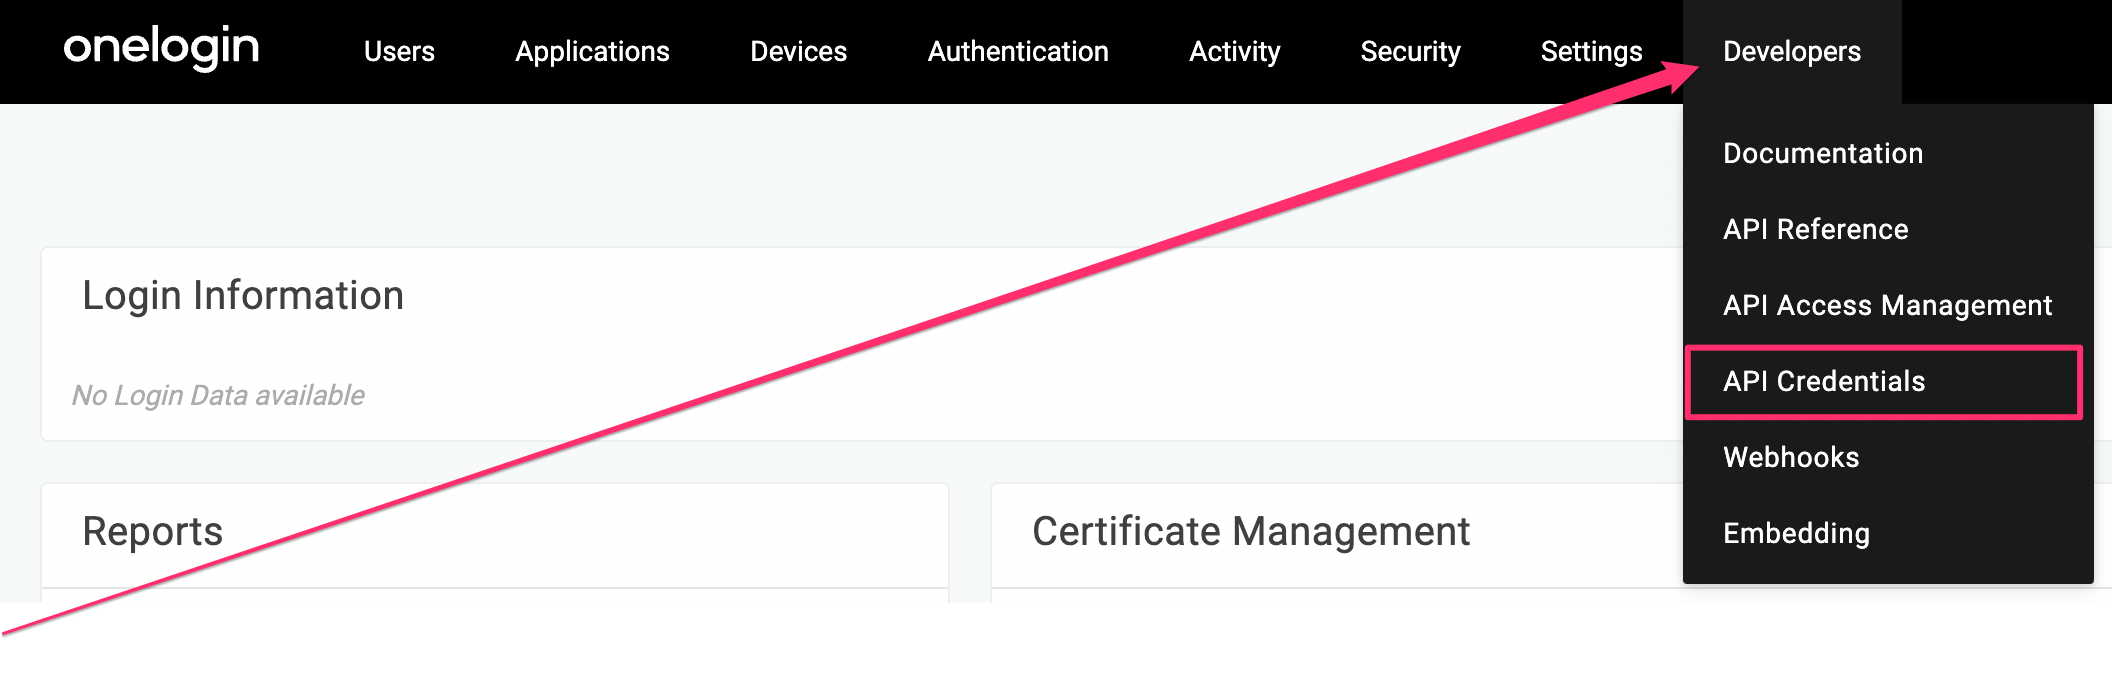
3
Click New Credential.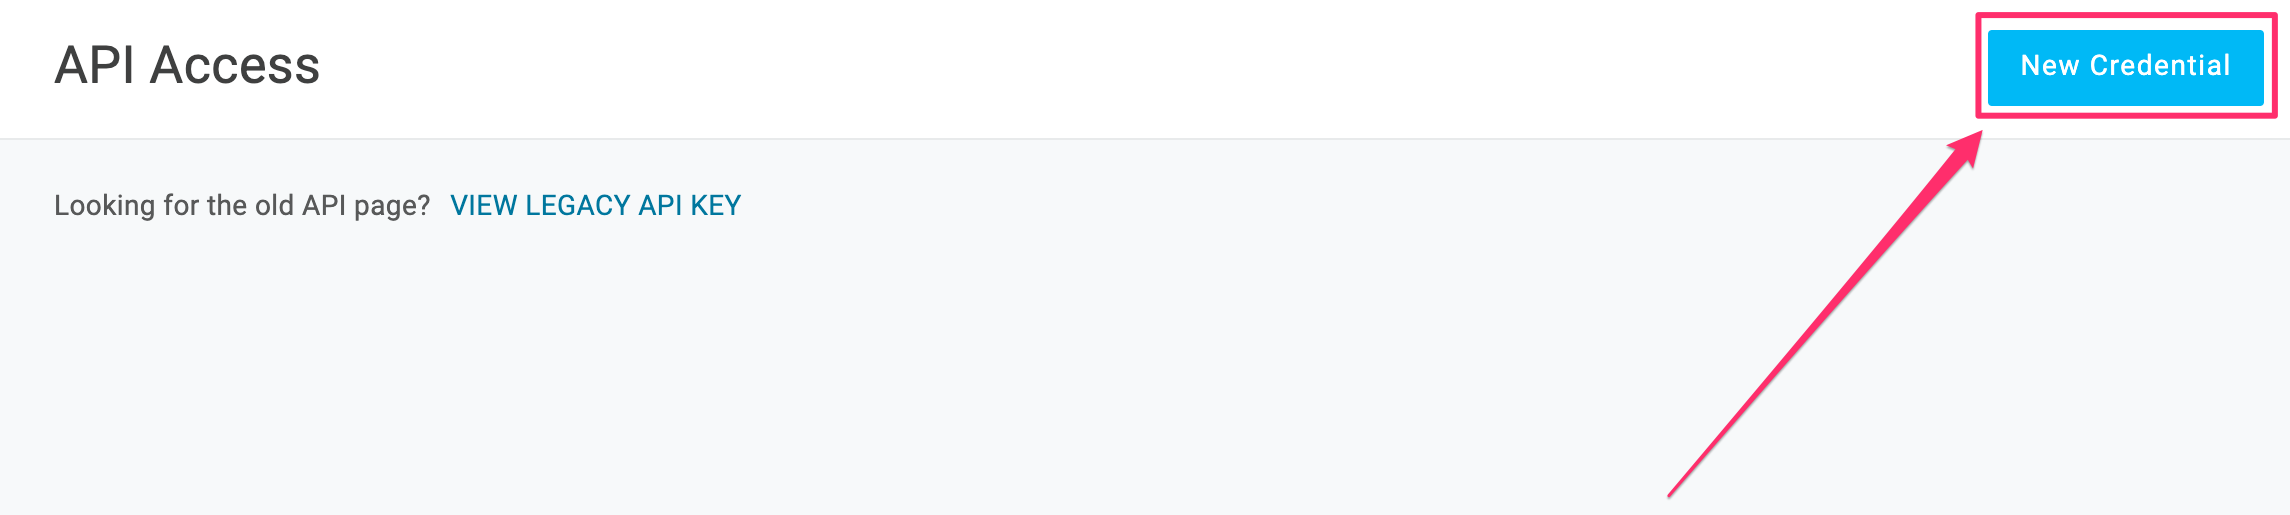
4
Give the API credential a name, such as ConductorOne.
5
Select the Manage all scope.
6
Click Save.
7
When the new API credential is created, copy and save the Client ID and Client Secret. We’ll use these in Step 3.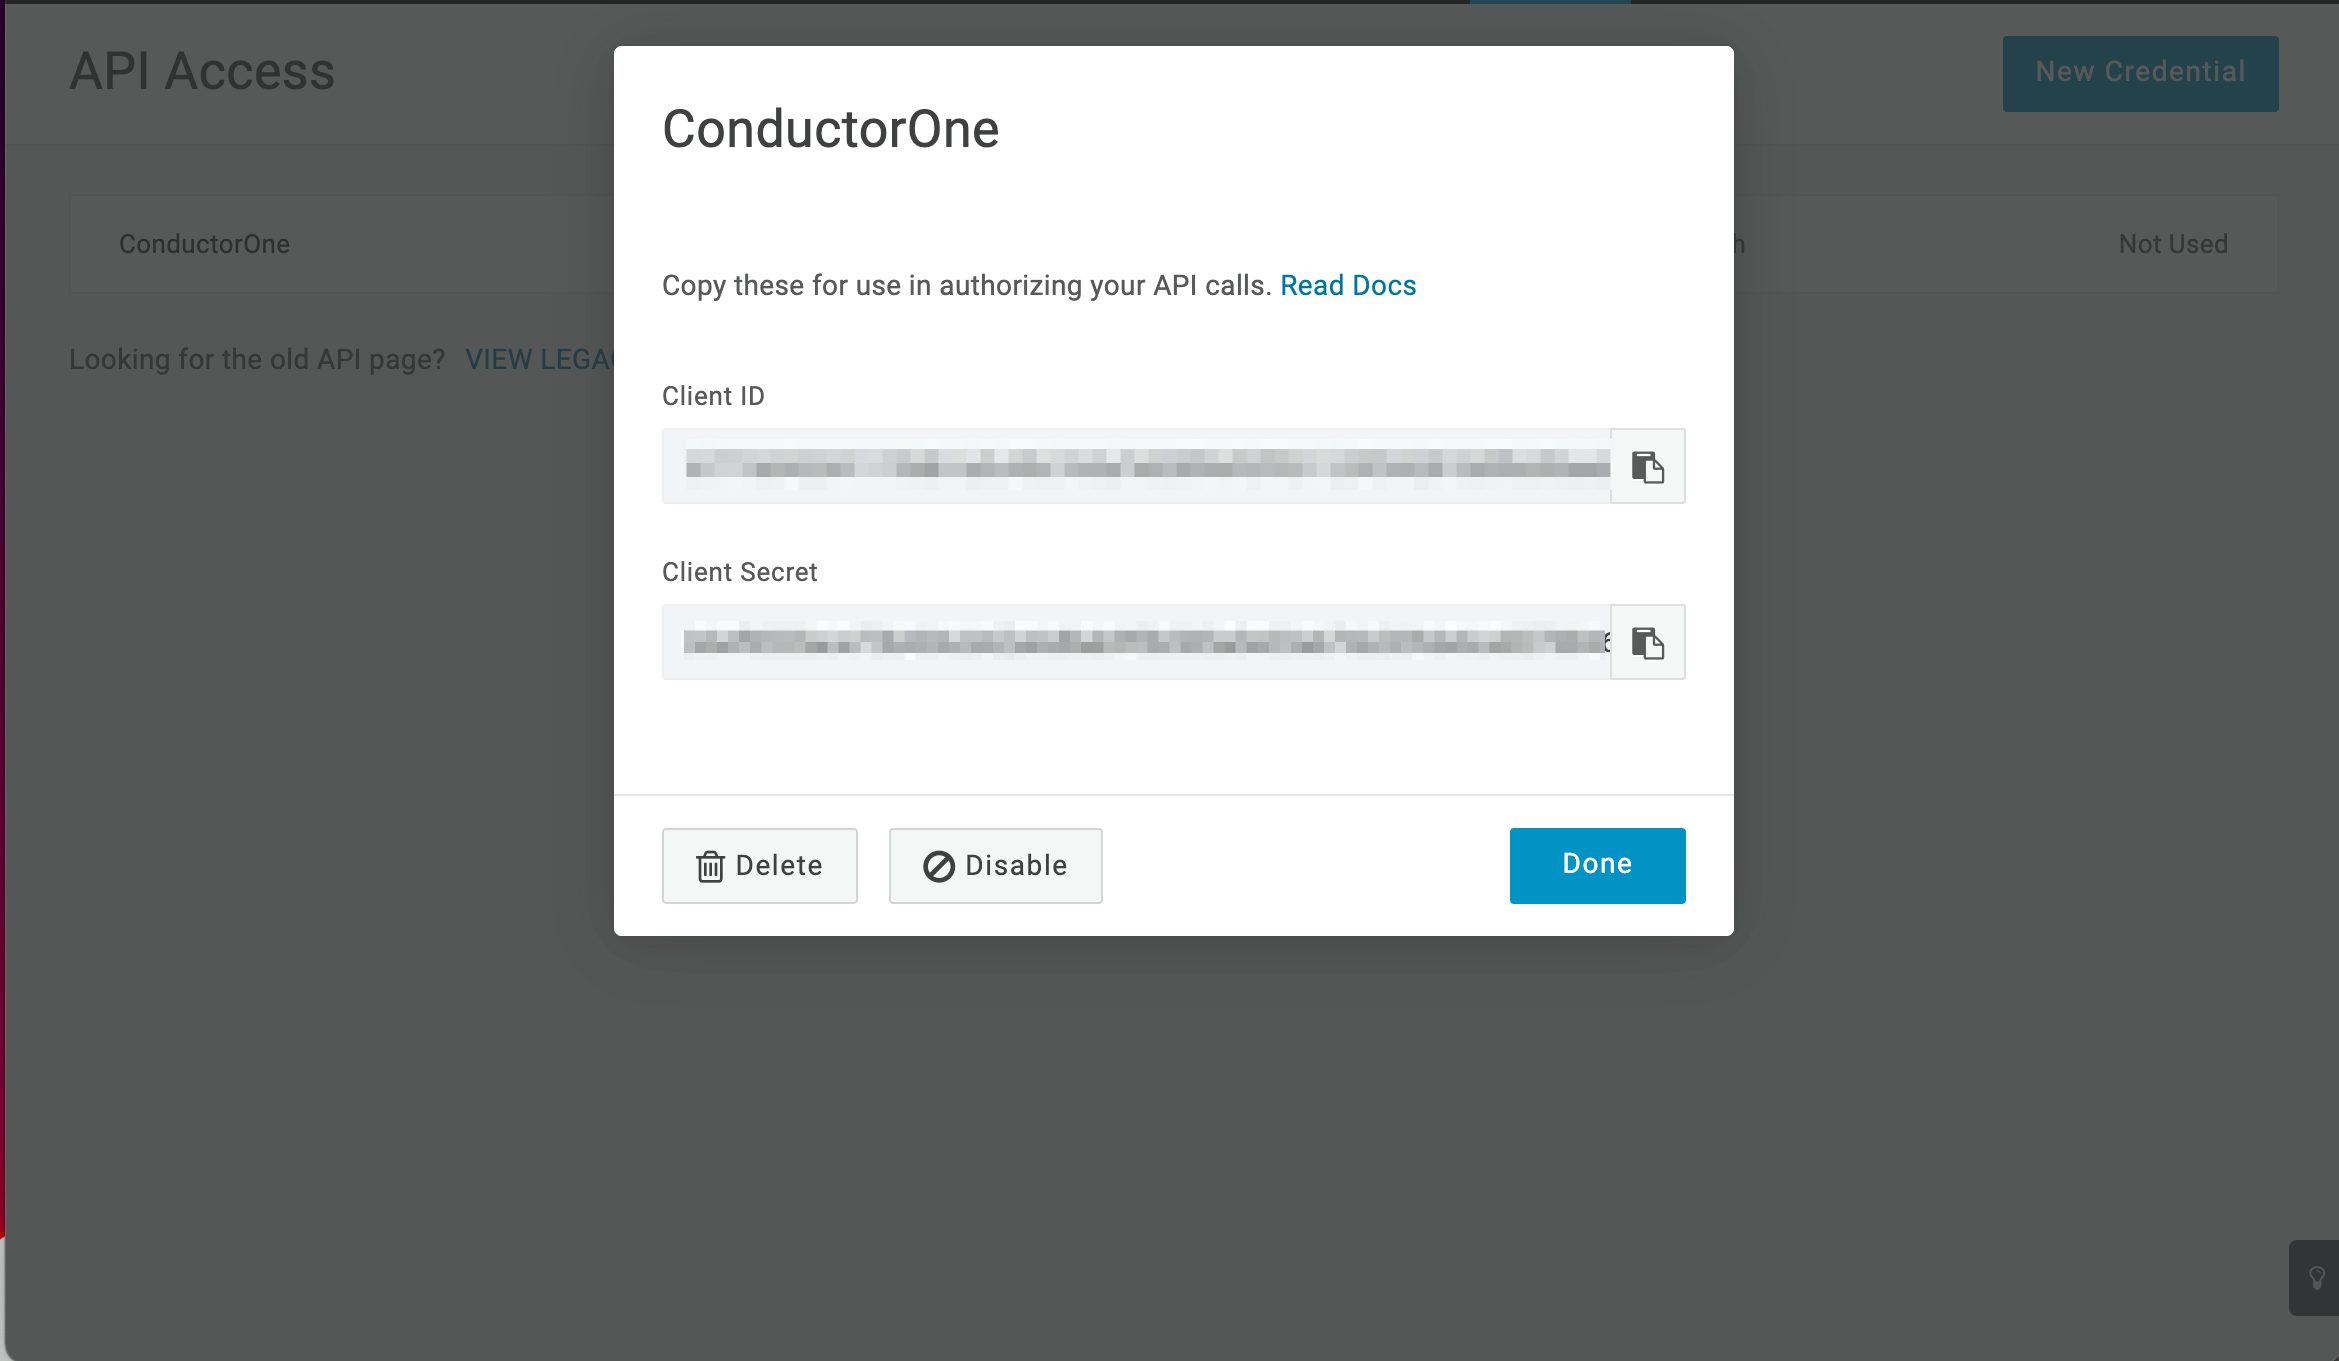
Step 3: Add your OneLogin credentials to ConductorOne
1
In ConductorOne, navigate to the OneLogin connector by either:
- Clicking the Set up connector link in the email you received about configuring the connector.
- Navigate to Connectors > OneLogin (if there is more than one OneLogin listed, click the one with your name listed as owner and the status Not connected).
2
Find the Settings area of the page and click Edit.
3
In the OneLogin domain field, enter the domain you looked up in Step 1.
4
In the OneLogin client ID field, enter the client ID from Step 2.
5
Paste the client secret from Step 2 into the OneLogin client secret field.
6
Click Save.
7
The connector’s label changes to Syncing, followed by Connected. You can view the logs to ensure that information is syncing.